
Recording Test Flows with Light
Master the art of recording test flows using the Light QA Extension. Learn how to capture interactions, generate stable selectors, and create production-ready test automation.
Getting Started with Recording
Recording a test flow is straightforward. Follow these steps to capture your first automated test:
- Install Light QA Extension: If you haven't already, install the extension from the Chrome Web Store. See our installation guide for details.
- Navigate to Your Website: Open the website or web application you want to test in your browser
- Open Light QA Panel: Click the Light QA extension icon in your browser toolbar
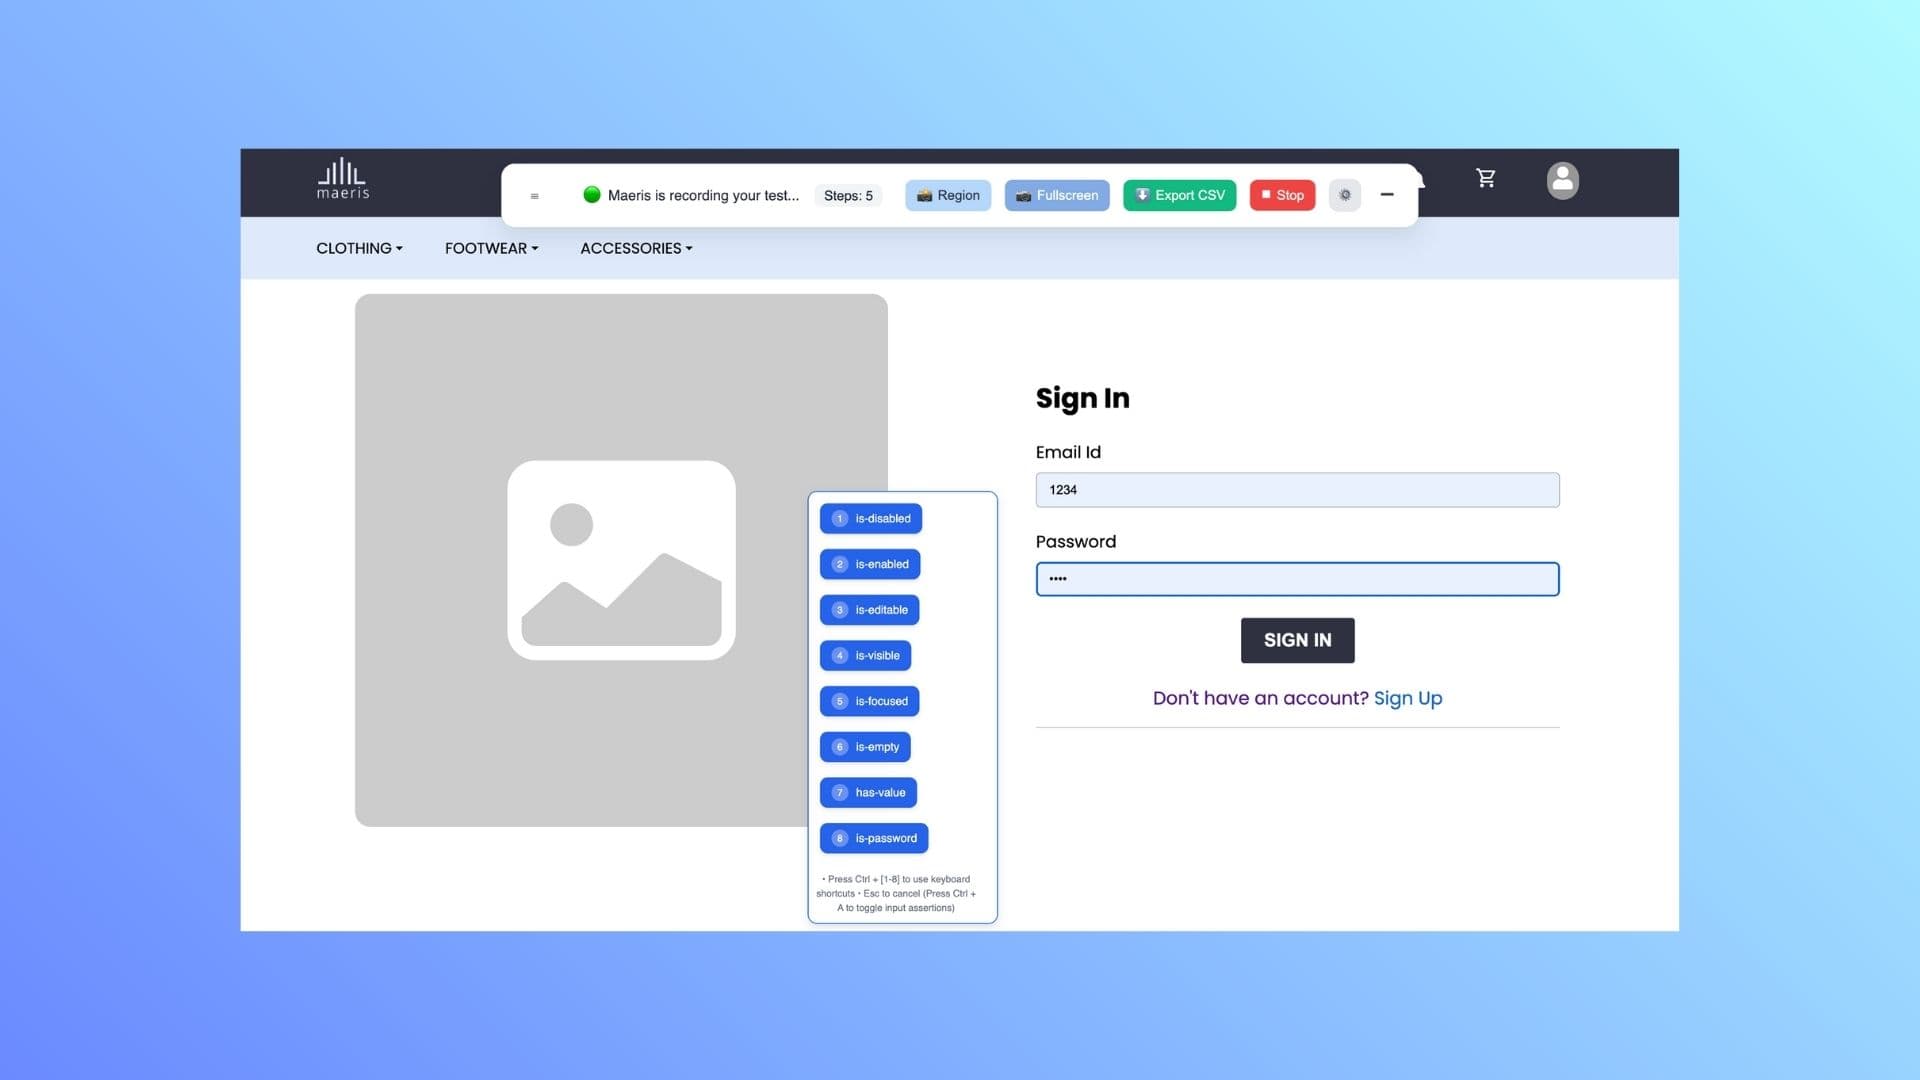
- Click "Start Recording": Begin capturing your interactions
- Interact Naturally: Perform the actions you want to test - click, type, navigate, etc.
- Stop Recording: Click "Stop Recording" when you're finished
What Gets Captured
Light automatically captures a wide range of interactions:
UI Interactions
- Clicks on buttons, links, and interactive elements
- Text input into form fields
- Dropdown selections
- Checkbox and radio button selections
- Page navigation and URL changes
- Scroll actions
- Hover events
Selectors
- Stable CSS selectors for each element
- XPath expressions
- Element IDs and classes
- Multiple selector strategies for reliability
Network Activity
- All API calls made during the flow
- Request and response details
- Headers and payloads
- Network timing information
Recording Best Practices
Before Recording
- Plan Your Flow: Think through the user journey you want to test before starting
- Clean State: Start from a known state (e.g., logged out, on homepage)
- Close Unnecessary Tabs: Reduce noise and focus on your target application
- Prepare Test Data: Have test credentials or data ready if needed
During Recording
- Work at a Normal Pace: Don't rush - Light captures accurately even with natural timing
- Wait for Page Loads: Allow pages to fully load before clicking next elements
- Use Clear Actions: Click directly on elements rather than nearby areas
- Complete the Flow: Record the entire user journey from start to finish
- Avoid Unnecessary Actions: Skip exploratory clicking that's not part of your test
After Recording
- Review the Steps: Check that all intended actions were captured
- Verify Selectors: Light generates stable selectors, but review them
- Add Assertions: Consider adding verification steps for important outcomes
- Name Your Recording: Give it a descriptive name for easy identification
Recording Different Test Scenarios
Login and Authentication Flows
Recording authentication flows:
- Start from the login page
- Enter credentials (Light will capture the input)
- Click the login/submit button
- Wait for redirect to dashboard or home page
- Verify successful login (check for welcome message or user menu)
Tip: Use variables or environment-specific credentials when exporting to Playwright for better security.
Form Submission Flows
Recording form filling and submission:
- Navigate to the form page
- Fill in each field systematically
- Select dropdown values
- Check/uncheck checkboxes as needed
- Click submit or save
- Verify success message or confirmation
Navigation and Browsing Flows
Recording user navigation patterns:
- Start from homepage or landing page
- Navigate through menu items or links
- Visit different pages or sections
- Use breadcrumbs or back buttons
- Verify correct pages load
Reviewing and Editing Recorded Steps
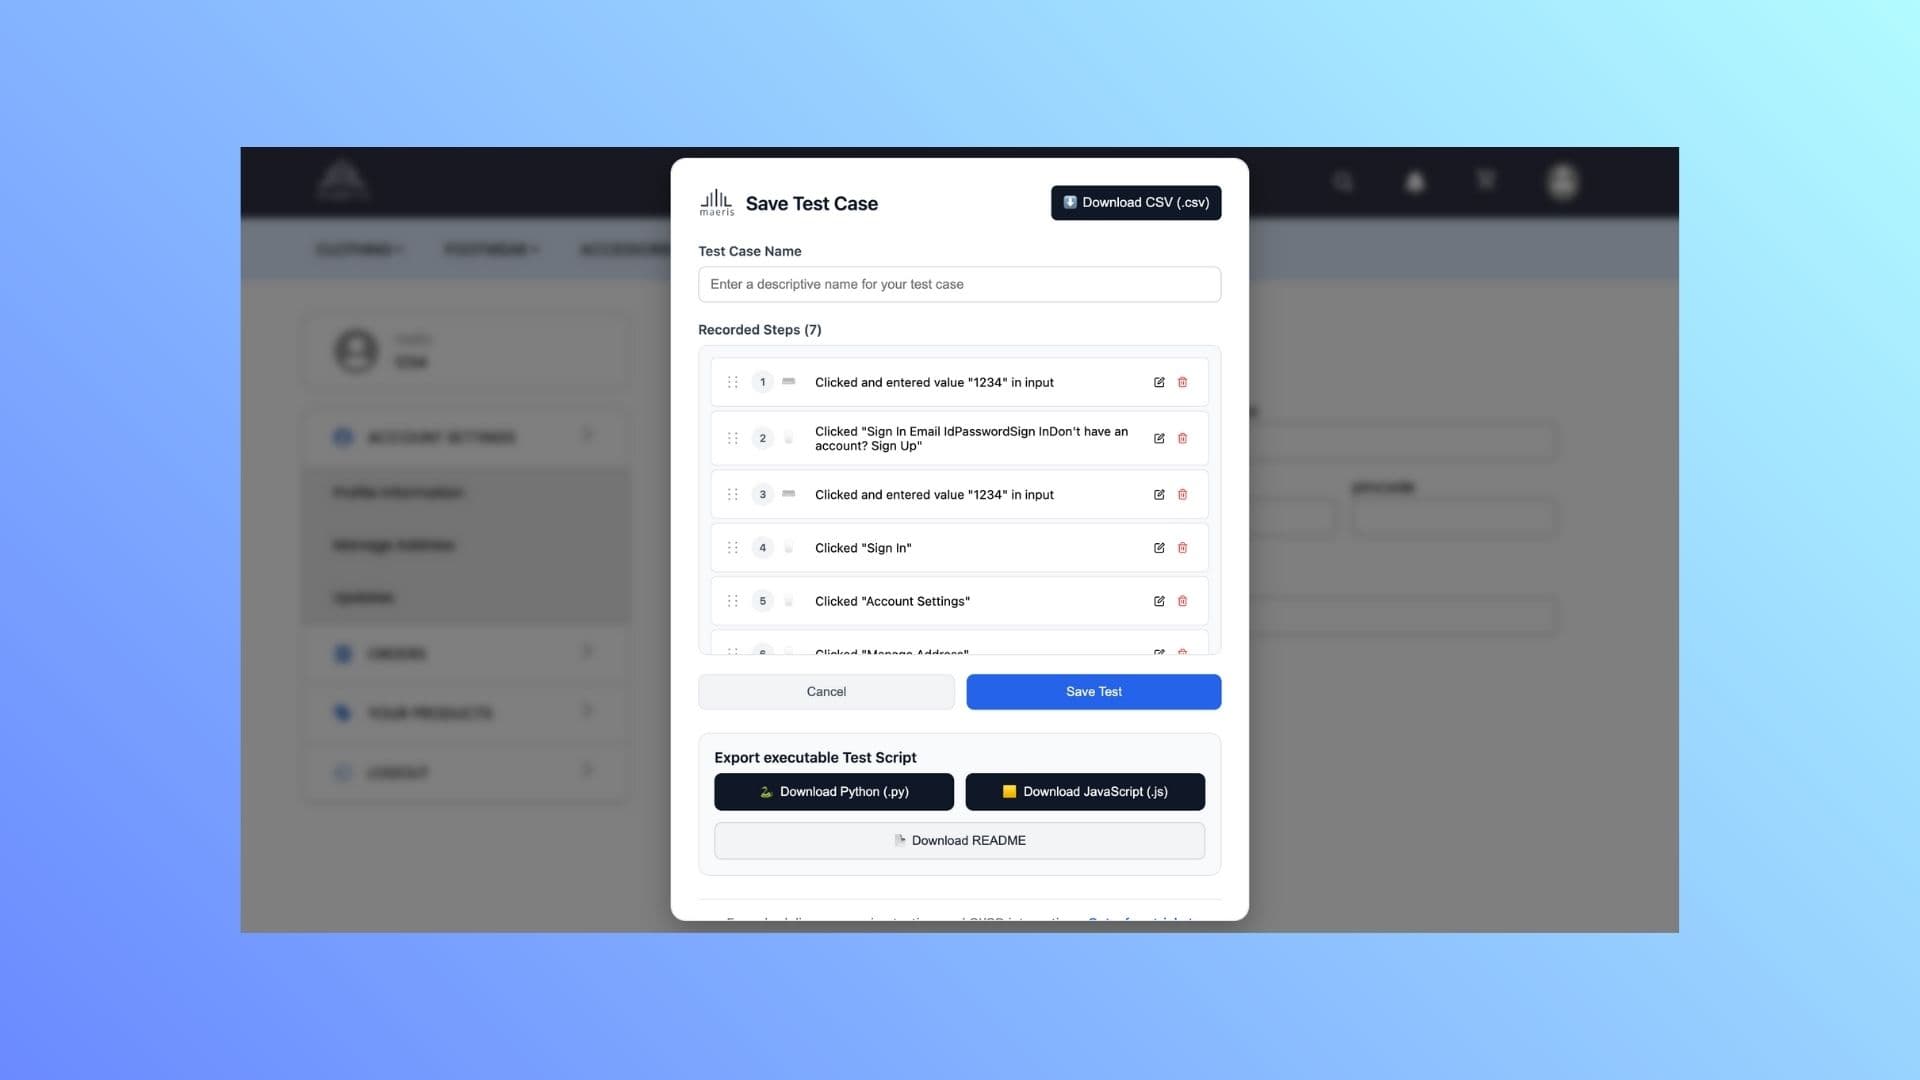
After recording, you can review and edit the captured steps:
- View Steps List: See all captured actions in chronological order
- Edit Actions: Modify individual steps if needed
- Remove Steps: Delete unnecessary or incorrect captures
- Reorder Steps: Rearrange actions if the order needs adjustment
- Add Manual Steps: Insert additional actions or assertions
- Verify Selectors: Check and adjust selectors for better stability
Exporting Your Recorded Flow
Once you're satisfied with your recording, export it for use:
Export Formats
- Playwright Python: Ready-to-run Python scripts using Playwright
- Playwright JavaScript: Ready-to-run JavaScript/TypeScript scripts
- API Collection (JSON): Export captured API calls as a JSON collection
After Export
- Save the exported file to your project
- Review the generated code
- Install Playwright dependencies if needed
- Run the test to verify it works
- Integrate into your test suite
Advanced Recording Features
Video Recording
Enable video recording for additional context:
- Captures entire session as a video file
- Perfect for debugging failed tests
- Useful for sharing with team members
- Helps with documentation and training
Enable video recording before starting your recording session.
API Call Capture
Light automatically captures all API calls during recording:
- View all network requests made during the flow
- Inspect request/response details
- Export API calls as a separate collection
- Use for API testing and documentation
Troubleshooting Common Issues
Steps Not Being Captured
- Ensure recording is started before interacting with the page
- Check that the extension icon shows "Recording" status
- Refresh the page and start a new recording if needed
- Verify the extension has necessary permissions
Unstable Selectors
- Light generates multiple selector strategies automatically
- Review and edit selectors manually if needed
- Use more specific selectors (IDs, data attributes) when possible
- Consider adding wait conditions in the exported code
Export Not Working
- Make sure you've stopped the recording before exporting
- Verify at least one interaction was captured
- Check your browser's download settings
- Try exporting again or restart the extension
Next Steps
Now that you can record test flows:
- Learn about advanced extension features
- Explore writing tests in plain English with Terminal
- Check out API testing features for comprehensive test coverage